Outdoor stairs are transition points where safety and design intersect. At night, these spaces demand thoughtful illumination to prevent missteps and guide guests confidently toward an entrance. The right outdoor stair lighting does more than provide visibility. It shapes the ambiance of an approach, accentuates architectural details, and creates a warm welcome before anyone reaches the door.
When selecting outdoor step lights, weather resistance is essential. Fixtures must be wet-rated and engineered to withstand the full range of temperatures in the region. This guide covers the fixture types available, placement principles, and curated ideas featuring leading designer brands to help identify the outdoor stair lighting that fits the space.
Why Light Your Outdoor Stairs
Well-planned stair lighting serves multiple purposes beyond basic illumination:
- Safety and fall prevention. Steps and risers become visible hazards after dark. Proper lighting defines each tread clearly, reducing the risk of trips and falls at transition points.
- Ambiance and welcome. A warm glow along a stairway sets the tone for the entire home, signaling care and intention before guests step inside.
- Architectural accent. Lighting reveals the materials and craftsmanship of outdoor stairs, whether stone, wood, or concrete, turning functional elements into design features.
- Security and home value. Illuminated pathways deter intruders and enhance curb appeal, adding practical and perceived value to the property.
Types Of Outdoor Stair Lights
Understanding fixture categories helps match the lighting approach to the space.
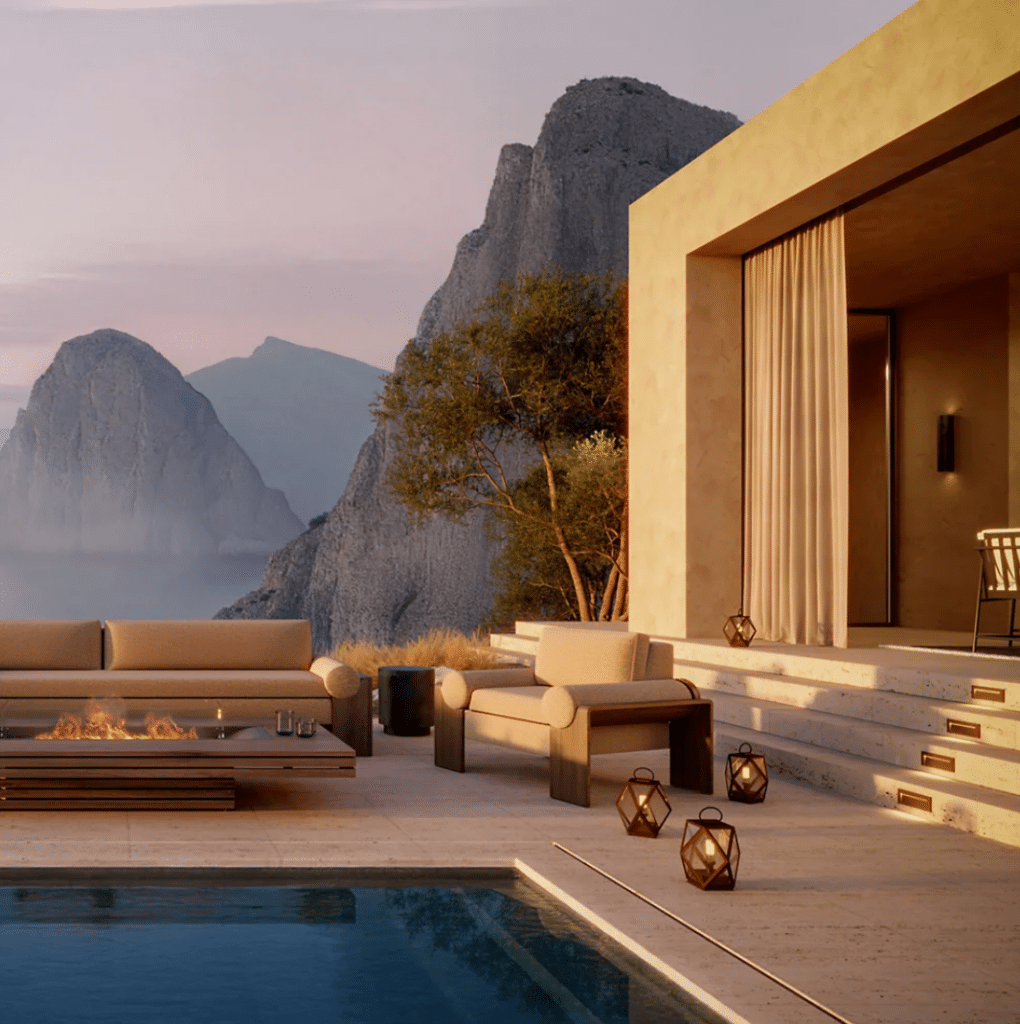
Recessed riser lights install flush into the vertical face of each step, casting light downward onto the tread below. This creates a clean, modern look with no visible fixture. Brands like Hinkley Lighting, Generation Lighting, and WAC Lighting offer recessed options designed for outdoor applications.
Path lights stand alongside stairways and walkways, casting pools of light from above. They suit open staircases where recessed installation is impractical and extend the lighting scheme along connecting paths.
Wall-mounted step lights and sconces attach to adjacent walls, columns, or railings. They provide side illumination and work well on stairs flanked by vertical surfaces.
Post-cap and rail lighting integrates into deck railings or newel posts, combining structure and light in a single element.
Bollard lights are freestanding fixtures that mark stair edges and landings, providing both illumination and visual guidance along the route.
The choice between up-lighting and down-lighting affects ambiance: down-light from recessed fixtures feels subtle and modern, while up-light from path lights or bollards adds drama and visibility from a distance.
Outdoor Stair Light Comparison
| Fixture Type | Best Use | Light Effect | Installation Note |
|---|---|---|---|
| Recessed riser | Modern flush appearance | Downward wash on tread | Requires riser depth; wet-rated |
| Path light | Open stairs, walkways | Pool of light from above | Stake or surface mount; solar or hardwired |
| Wall sconce | Stairs with adjacent walls | Side illumination | Hardwired; coordinate with architecture |
| Post-cap | Deck railings, newel posts | Soft glow along rail line | Sized to fit post dimensions |
| Bollard | Landings, stair edges | 360° ambient glow | Freestanding; durable base |
Select the fixture type based on the stair construction, surrounding architecture, and the desired visual effect.
Start With A Warm Welcome

When building wooden or concrete outdoor stairs, consider adding recessed step lights that will illuminate the step for safety and style. Each light can be installed in the riser of the step so that light is thrown from the center of the step toward the edges.
For an easy upgrade to open outdoor stairs, add lights to the supports beneath the steps so that a warm glow is emitted between each one. Make sure the lights are wet-rated so they won’t be damaged by precipitation and try to echo the temperature of light given off by other outdoor fixtures.
Illuminate The Entire Path

Another great way to illuminate outdoor stairs is by installing path lights around the steps. Choose ones that are solar-powered and have a design that won’t allow water to accumulate. A classic lantern design with a square pyramidal roof is a good choice.
Path lights offer flexibility for concrete, masonry, and stone staircases where recessing fixtures into the material is impractical or cost-prohibitive. Solar-powered options simplify installation, requiring no wiring, while low-voltage hardwired systems provide consistent output regardless of sunlight exposure. For longer stairways, low-voltage systems often deliver more reliable performance through the night.
Take The Sleek And Modern Approach

For concrete steps leading up to a porch, inlay LED recessed lights for a sleek and modern aesthetic. Place multiple fixtures on each riser to ensure adequate illumination for safety. Square or rectangular fixtures complement a modern style.
Ensure Safety For Your Guests

Recessed LED lights are a great choice for outdoor stairs that wrap around a large patio. Placed on each riser at regular intervals, recessed lights will provide focused light for safer steps and a warm ambient illumination for intimate gatherings on the patio.
How To Place Outdoor Stair Lights
Follow these principles to achieve even, glare-free illumination:
- Illuminate both tread and riser. Position fixtures so light falls on the horizontal surface where feet land and defines the vertical edge of each step.
- Space lights evenly. For recessed step lights, install one every two to three steps. For path lights along a stairway, maintain roughly three to five feet between fixtures, adjusting for stair width and fixture output.
- Mount low to minimize glare. Step lights installed in risers should sit four to six inches above the tread surface. This angle casts light downward without shining into eyes.
- Coordinate color temperature. Warm white (2700K–3000K) creates a welcoming ambiance. Cooler temperatures (4000K) increase visibility for task-focused areas. Stay consistent across the stairway for a cohesive look.
- Choose the right brightness. For subtle step definition, fixtures producing 10–20 lumens per light are typically sufficient. Brighter is not always better; over-lighting creates harsh shadows and glare.
- Test placement before final install. Set fixtures temporarily at night to evaluate light distribution, shadow patterns, and overall effect before committing to permanent installation.
Frequently Asked Questions
What is the best way to light up outdoor stairs?
Recessed riser lights offer the most integrated look, casting light directly onto each tread. For open or stone stairs where recessing is impractical, path lights or wall-mounted fixtures provide effective alternatives.
What is the best type of light for outdoor stairs?
LED fixtures are the standard for outdoor stair lighting. They consume less energy, produce minimal heat, last longer than incandescent alternatives, and are available in a wide range of color temperatures.
How bright should outdoor stair lights be?
Most outdoor step lights work well in the 10–20 lumen range. This provides enough visibility to define each step without creating glare or washing out the ambiance.
How far apart should step lights be spaced?
For recessed riser lights, every two to three steps is a common guideline. For path lights, space fixtures three to five feet apart, adjusting based on light output and stair width.
What are common outdoor stair lighting mistakes?
Over-lighting, uneven spacing, fixtures that create glare, and using non-wet-rated products in exposed locations. Inconsistent color temperatures across fixtures also disrupt the visual harmony of a lighting scheme.
Adding lights to outdoor stairs makes them safer and introduces a layer of style and inviting warmth to the space. Choose wet-rated fixtures designed for the conditions and in a style that complements the architecture. Whether recessed lights installed in the risers or lanterns placed along the path, outdoor stair lighting shapes the first impression of a home.